Beezz Fryer
An air fryer that leaves fries limp, shuts off mid-cycle, or fills the kitchen with smoke can make a simple dinner frustrating. Many common faults have ordinary causes: a crowded basket, blocked vents, grease on the heating element, or a loose plug. Knowing how to troubleshoot common air fryer problems starts with careful observation, not guesswork. Note when the issue occurs, check the display, and let the appliance cool before inspecting removable parts.
Appliance-care expert Ron Shimek, president of Mr. Appliance, is a useful professional reference for practical maintenance. The core advice in this guide is offered as a paraphrase, not a verbatim quote: “Check the simple causes first, and never ignore signs of electrical damage.” That approach matters. A basket packed to the rim can restrict airflow; a greasy element may produce a sharp smell; an outlet that feels hot deserves attention. Stop using the fryer if its cord is damaged, sparks appear, or the unit behaves unusually, and consult the manual or a qualified technician.
Small checks often solve the problem. Still, not every symptom has a simple fix. This 2026 guide explains how to identify uneven cooking, weak heating, unexpected shutdowns, persistent odors, and control-panel issues. It also shows when cleaning or adjusting settings may help—and when repair is the safer choice. Keep expectations realistic: models differ, and one checklist cannot diagnose every fault. Start with the evidence in front of you.
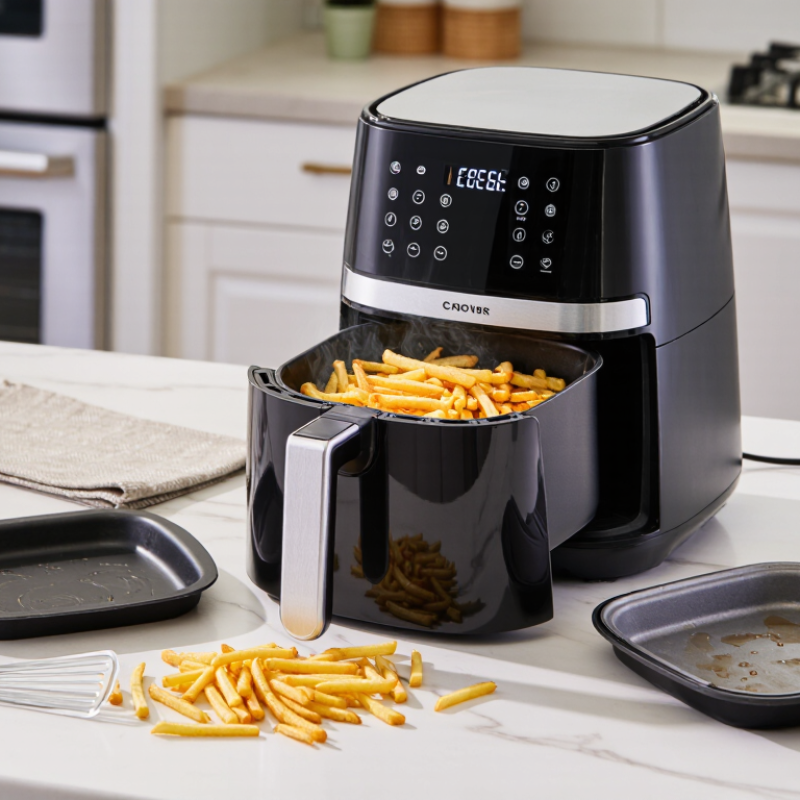
Before troubleshooting an air fryer, describe exactly what it is doing. Does the display stay dark, or does the unit start and stop? A dark display may point to a loose plug, an unseated basket, or an electrical fault. Check the outlet and basket position only when the appliance is cool and unplugged. If the cord is damaged, stop using it.
Notice how the food cooks. Pale tops with burnt undersides, or crisp edges beside soggy centers, can signal overcrowding or blocked airflow. A small batch of fries should have room to move; a packed basket rarely cooks evenly. Smoke deserves attention. Grease on the heating area can smoke, while a sharp electrical smell is a reason to switch off and unplug the unit. Listen, too. A brief fan sound is normal, but scraping, rattling, or sudden silence may indicate a problem. Small clues matter. Note when the symptom begins, what food is inside, and whether it repeats. It is tempting to blame the appliance immediately, but food moisture and basket loading can mislead you. If symptoms persist, consult the manual or a qualified repair professional rather than opening the housing.
When an air fryer will not start, check the power supply before assuming the appliance has failed. Make sure the plug sits firmly in a working wall outlet, and test that outlet with another small device. Keep hands dry while handling the plug. If the cord is frayed, hot, or visibly damaged, stop using the fryer and arrange a safe repair. Avoid repeatedly resetting a tripped breaker; unplug the fryer, reduce the load on that circuit, and seek help if the breaker trips again. Check the manual before using an extension cord, since some models require a direct wall connection.
It can feel annoyingly basic, but check the controls and setup too. Confirm that the temperature and cooking time are set, rather than relying on a delayed-start or pause setting. Reseat the basket or tray so it sits flush; many fryers will not run when parts are misaligned. Look for a control lock or an indicator light that signals an unfinished step. If the screen stays blank, disconnect the unit briefly only if the manual permits it, then reconnect it. Do not open the housing to inspect wiring. A missed setting is easy to overlook, even when the display looks ready.
| Problem or Symptom | Possible Cause | What to Check | Basic Troubleshooting Steps | When to Stop and Seek Service |
|---|---|---|---|---|
| Air fryer does not turn on | No power at the outlet, a loose plug, or the basket is not fully seated on models with a safety interlock. | Check that the plug is firmly inserted and that the outlet works with another suitable appliance. Check the basket position. | Place the appliance on a stable, dry surface and reconnect it directly to a suitable wall outlet. Reseat the basket and try the controls again. | If the outlet works but the appliance remains unresponsive, or the cord or plug is damaged, unplug it and contact a qualified service provider. |
| Display is blank or buttons do not respond | The unit may not be receiving power, the controls may be locked, or the control panel may need to reset. | Look for a control-lock indicator, confirm the outlet is working, and check the user manual for the model’s reset or unlock procedure. | Unplug the appliance, allow it to cool, and wait about one minute before reconnecting it. Use only the documented button sequence to unlock controls. | If the display stays blank, flashes repeatedly, or buttons remain unresponsive after a reset, discontinue use and arrange service. |
| Appliance turns off during cooking | The basket or drawer may have shifted, airflow may be restricted, or an overheat protection feature may have activated. | Check whether the basket is fully in place and whether the air inlets and outlet are blocked. Consider whether the appliance is close to a wall or other heat-sensitive surface. | Turn the appliance off, unplug it, and let it cool completely. Clear the vents, allow the recommended clearance around the unit, and reseat the basket before restarting. | If it repeatedly shuts down, smells burnt, or produces smoke beyond normal cooking vapor, unplug it and seek qualified service. |
| Food cooks unevenly | The basket may be overcrowded, food pieces may vary in size, or hot air may not circulate freely. | Check whether food is in a single layer where practical and whether the basket is filled beyond the recommended level. | Cook smaller batches, cut food into similar-sized pieces, and shake or turn food halfway through cooking when appropriate. | If cooking remains unusually uneven with a correctly loaded basket and suitable settings, consult the appliance manual or service provider. |
| Food is not crisp or takes longer than expected | The unit may not have preheated when required, the basket may be overloaded, or food may contain excess surface moisture. | Check the recipe’s temperature and time, the appliance’s preheat instructions, and the amount of food in the basket. | Preheat if recommended, pat wet ingredients dry, leave space for airflow, and cook in batches. Add time in short increments while checking food doneness. | If the appliance does not heat at all or cannot maintain a cooking temperature, stop using it and request service. |
| Cooking temperature or timer seems incorrect | A setting may have been entered incorrectly, the controls may have been touched accidentally, or the appliance may need a reset. | Verify the selected temperature and time on the display and compare them with the manual’s operating instructions. | Cancel the program, re-enter the settings, and monitor cooking progress. If needed, reset the unit using the method in the manual. | If the displayed settings change on their own or heating appears uncontrolled, unplug the appliance and contact a qualified service provider. |
| Excessive smoke during cooking | Grease or food residue may be burning, or fatty foods may be producing smoke as drippings heat up. | Check for accumulated grease in the drawer or pan and for food debris on surfaces that are accessible for routine cleaning. | Switch off and unplug the appliance. Let it cool fully, then clean removable parts according to the manual. Avoid exceeding the recommended fill level. | If smoke continues after cleaning, or there is a burning electrical smell, unplug the unit and do not use it until it has been inspected. |
| Basket or drawer is difficult to insert | The basket may be misaligned, overloaded, or obstructed by food debris. | Check that removable parts are correctly assembled and that no food or packaging is caught in the drawer path. | Remove the basket, allow it to cool if necessary, clear visible debris, and slide it back in gently without forcing it. | If the drawer is bent, cracked, or will not seat securely, stop using the appliance and obtain an appropriate replacement part or service. |
Safety note: Always switch off and unplug the air fryer before cleaning or checking removable parts. Let it cool completely, keep water away from electrical components, and do not open or repair the appliance housing yourself. Follow the instructions supplied with your specific model.
Uneven cooking often comes from a crowded basket, not a faulty heater. Arrange food in one layer, leave gaps for airflow, and shake or turn pieces midway. If the outside browns quickly but the center stays raw, reduce the temperature and extend cooking time. Check chicken with a food thermometer: USDA FSIS guidance sets 165°F as its safe minimum internal temperature. Color alone is unreliable. This is easy to overlook, so check more than one piece.
Smoke often points to grease or crumbs left beneath the basket. Once the appliance is cool and unplugged, clean the drawer and heating area as its care instructions allow. Fatty foods can also drip and smoke; trim excess fat and avoid adding more oil than needed. NFPA’s Home Cooking Fires report estimated an average of 158,400 U.S. home fires involving cooking equipment each year from 2017 to 2021. That figure covers cooking equipment broadly, not air fryers alone. Take persistent or heavy smoke seriously.
A lingering food smell may come from residue, but a sharp plastic or electrical odor deserves caution. Stop cooking, unplug the unit, and check for trapped packaging, damaged wiring, or visible damage. Don’t keep testing it if the smell persists. A single failed batch cannot identify the cause; inspect the appliance and follow its care guidance before using it again.
Use a food thermometer to check doneness when food cooks unevenly. These USDA-recommended minimum internal temperatures are useful reference points.
For more even cooking: Arrange food in a single layer, avoid overcrowding, and turn or shake it partway through. If the fryer smokes, switch it off and check for excess grease or food residue after it cools. If an unusual odor persists after cleaning, unplug the appliance and stop using it until it has been checked.
Temperature guidance: USDA safe minimum internal temperatures. Whole cuts of beef, pork, and lamb should rest for 3 minutes after reaching 145°F.
Restricted airflow can make food brown unevenly, cook slowly, or leave the basket unusually hot. Unplug the fryer and let it cool completely before cleaning. Remove the basket and crisper plate, then wash them as the manual directs. Wipe the inner chamber with a damp, non-abrasive cloth. Check the air intake and exhaust for grease, crumbs, or lint. Small details matter.
Keep debris out of the fan opening; poking inside can damage parts. Dry every removable piece before reinstalling it. Also check that the fryer has the clearance its manual recommends. A wall, cloth, or crowded counter can obstruct vents. It is easy to blame the heating element too quickly, but residue and blocked vents are simpler problems to rule out. If airflow still seems weak, or the unit makes unusual noises, stop using it and seek qualified service.
Cleaning is not a substitute for safe cooking, but it supports reliable operation. The National Fire Protection Association’s Home Cooking Fires report found cooking equipment was involved in about 49% of reported U.S. home fires from 2017 to 2021; that figure covers cooking equipment broadly, not air fryers alone. Wipe away fresh grease after cooling, and clean more often when you cook oily foods. Avoid soaking the appliance body or using sharp tools. One missed crumb is easy to overlook. Check again.
Before replacing an air fryer, check whether the fault is simple. A loose basket, blocked airflow, or greasy temperature sensor can cause uneven cooking. Unplug the unit, let it cool, and clean removable parts. If it still fails, note the symptom: no heat, a fan that rattles, or a display that cuts out. Small fixes may be worthwhile. A damaged cord, melted plug, burning smell, or repeated power interruptions are different. Stop using the appliance and seek qualified service; do not open electrical parts yourself.
Compare the repair estimate with the cost of a suitable replacement, including any needed parts and labor. If a fan or control failure costs nearly as much as a new unit, replacement may make sense. That rule is imperfect. A repair can still be preferable if the appliance is otherwise sound and parts are available. The Global E-waste Monitor 2024, produced by UNITAR and the ITU, reports 62 million tonnes of e-waste generated worldwide in 2022; only 22.3% was documented as formally collected and recycled. That broader figure is not specific to air fryers, but it is a reason to avoid discarding a working appliance over a minor fault. Check the warranty and local repair options before deciding.
A crowded basket can block airflow. Arrange food in one layer, leave gaps, and shake or turn pieces midway.
Lower the temperature and cook it longer. For chicken, check more than one piece with a food thermometer; the safe minimum is 165°F.
Grease or crumbs beneath the basket may be smoking. Let the fryer cool, unplug it, and clean the drawer and heating area as instructed.
Trim excess fat and use only the oil needed. Persistent or heavy smoke deserves attention.
Stop cooking and unplug the unit. Check for trapped packaging or visible damage. If the smell persists, do not keep testing it.
Let it cool completely first. Wash removable parts as directed, then wipe the inner chamber with a damp, non-abrasive cloth. Avoid soaking the appliance body.
Yes. Check the air intake and exhaust for grease, crumbs, or lint, and keep the recommended clearance around the fryer. Small details matter.
Stop using the fryer if airflow remains weak or unusual noises continue. Seek qualified service. I might blame the heater too quickly; residue is worth checking first.
This guide explains how to troubleshoot common air fryer problems by starting with the appliance’s symptoms, such as failure to turn on, uneven cooking, excess smoke, or unusual odors. It recommends checking the power connection, settings, basket placement, and basic setup before moving on to more specific fixes. Small adjustments, like avoiding overcrowding and turning food during cooking, can often improve results.
Regular cleaning is also essential for proper airflow and reliable performance. Removing food residue from the basket, tray, and interior can help reduce smoke and odors while supporting even cooking. If problems continue after these checks, inspect the appliance for damage and consult its care instructions to decide whether professional repair is appropriate or replacement is the safer, more practical option.